• Ever wanted an RSS feed of all your favorite gaming news sites? Go check out our new Gaming Headlines feed! Read more about it here.

Deleted member 9479

User requested account closure
Banned
Oct 26, 2017
2,953
Happy Thanksgiving everyone! Finished up three more Iron Golem in between cooking for the feast.
Edit: at family request made my insta private and created a public hobby profile.
 
Last edited:

Burny

Member
Oct 26, 2017
581
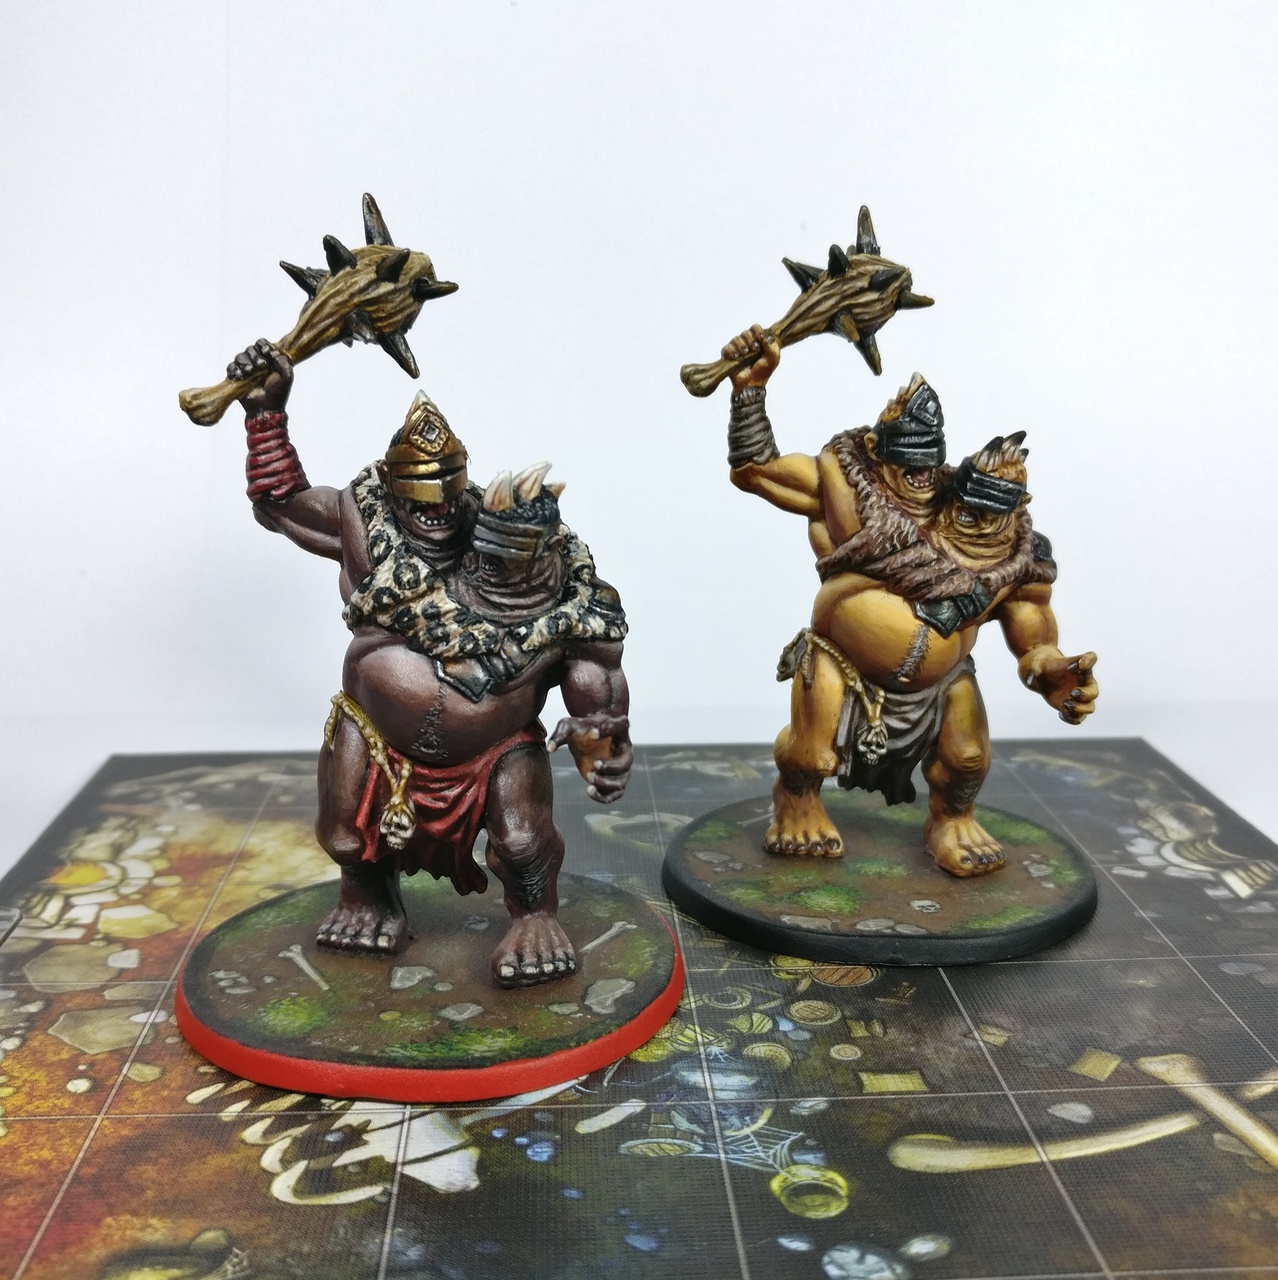
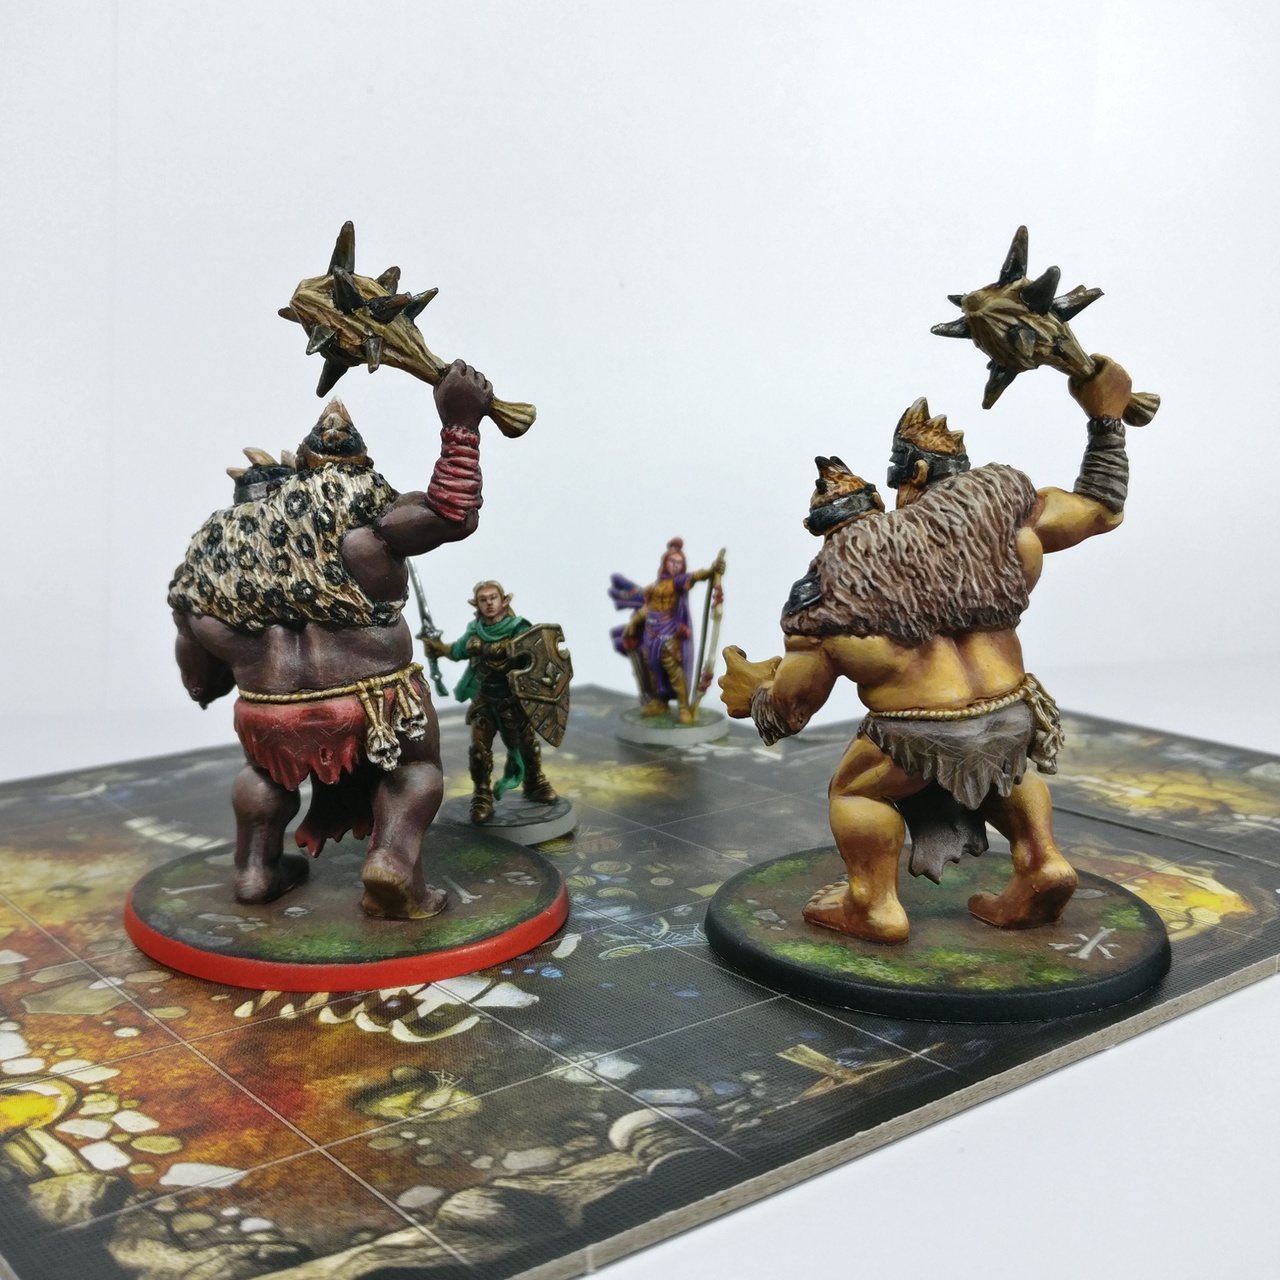
The Ettins are done!
img_20191201_225446-82j0p.jpeg

img_20191201_225749-vakdx.jpeg


Last edited:

Burny

Member
Oct 26, 2017
581
Damn, did you paint their bases? That's really cool! And really well done!
Thanks! :) Yes, I painted all bases of my Descent minis by hand.

It's much easier than it looks however, since you don't need to be too accurate with details. It's enough to manage to blend the bases with the game board's artwork. Just paint in layers from shadowy to brighter. Grass can be dabbed on in several layers from dark to light with a small bristle brush.
 

XShagrath

Member
Oct 25, 2017
1,198
Thanks! :) Yes, I painted all bases of my Descent minis by hand.

It's much easier than it looks however, since you don't need to be too accurate with details. It's enough to manage to blend the bases with the game board's artwork. Just paint in layers from shadowy to brighter. Grass can be dabbed on in several layers from dark to light with a small bristle brush.
You say not that hard, but it's definitely free-hand. Or as non-mini painters would say, painting.

The ease of most mini-painting is you have a well-defined "canvas", so to speak. It's almost akin to paint-by-numbers to some degree, at least in the base painting stages.
 

Bombless

Member
Oct 25, 2017
3,573
She fits! She fiiits!


This was a 5 hours or so build today. Deadline for the contest is saturday, will likely prime it tomorrow night so that leaves me a day of painting work. Pray to the Immortal Emperor for me, brothers and Sisters.
 

Burny

Member
Oct 26, 2017
581
Thanks all! Now let's see if I can get the Shadow Dragons done before the end of the year... ^^

@Bombless Nice base! What kind of cork plates did you use and where did you get them?

Edit:
You say not that hard, but it's definitely free-hand. Or as non-mini painters would say, painting.

The ease of most mini-painting is you have a well-defined "canvas", so to speak. It's almost akin to paint-by-numbers to some degree, at least in the base painting stages.
I get what you mean, but being a bit overly hyperbolic for a moment: The detail definition of some Descent minis is less than good and if the paint job manages to bring out details, it's sometimes despite the sculpt not because of it. Mold lines conveniently running through fur where they are near impossible to remove, small straps being so small it's hard to paint them without smearing color on all surrounding details despite good brushes, face details being mangled or poorly defined...

In comparison, freehand painting the bases to that somewhat sloppy level feels like a breeze for me. 😅 It's very enjoyable and you can really be sloppy, since you can let the brush strokes guide you, not having to fear painting over surrounding details by accident. A rock shadow/grass is a bit larger than initially intended? Just paint a larger rock, two rocks or another patch of grass. I had the idea for a while and saw e.g. freehand painted cobblestone on other Descent minis, but initially hesitated to attempt it, since I had not touched the brushes for ten years before restarting to paint minis this year. But once I tried it, it just clicked.
 
Last edited:

Bombless

Member
Oct 25, 2017
3,573
Burny thanks!
For the cork, I was stunned to find in my local Lidl 2mm sheets for table use along with some thick glass coaster plates (I used that for the ground piece).
 

Bombless

Member
Oct 25, 2017
3,573
How old is that ork? Feels like an 80s mini.

In other news...

I didn't expect for it to look this good tbh, I'm kinda shocked. I think I'll try to agrax the gold icons some more to make them look more worn but other than that it's pretty much done.
 

Jest

Member
Oct 28, 2017
4,565
How old is that ork? Feels like an 80s mini.

In other news...

I didn't expect for it to look this good tbh, I'm kinda shocked. I think I'll try to agrax the gold icons some more to make them look more worn but other than that it's pretty much done.


This is gorgeous. That base came together incredibly well. Great job all around!
 

sackboy97

Member
Oct 26, 2017
3,604
Italy
I saw a nice Paint Set with a few Warhammer minis the other day and I think I might try it out. They look cool, I think I might enjoy it. I'll probably have a look at some videos/read some tips in the mean time.
 

Griselbrand

Member
Oct 26, 2017
3,234
The official Warhammer TV channel has good tutorials for beginners. And there are a huge a mount of other channels out there that offer guides for beginners up to experts about specific color schemes, tools, and techniques. Share your stuff here when you get something painted up! It's a very rewarding hobby.
 

Xaszatm

Banned
Oct 25, 2017
10,903
I've been chipping away at my Sisters of Battle but have finals to worry about so will continue after that point. Here's what I've done so far:


image0.jpg

image1.jpg


image2.jpg


image3.jpg

As you can see my quality and skill is around "At least he thinned his paints".
 

Bombless

Member
Oct 25, 2017
3,573
It doesn't look bad at all but I think you need to thin your paints more and paint in thin layers. I like the colour scheme. Once you throw some washes on there it'll look much better!
White is probably one of the worst colours to start the hobby with haha.
 

affeinvasion

Member
Oct 26, 2017
3,946
I'm very quickly coming around to the zenithal + one thin base coat style of painting. I recently tried painting some figures that I had primed pure white or black and they have been a nightmare compared to the ones I used a zenithal prime on.
 

Bombless

Member
Oct 25, 2017
3,573
Potato pics of the finished mini and most of the contestants.


The Ravenwing is made by a pro painter, the Great Unclean by an arts teacher, the rest of us are common mortals, haha.
 

sackboy97

Member
Oct 26, 2017
3,604
Italy
I got the Paint Set yesterday, though I'll probably have to wait till the weekend to try anything out.
I wanted to give a wet palette a try; I'll probably start with an homemade version (like this article explains, for example), though I have to say this set looks very nice (albeit being on the expensive side).
 

Foofaraw

Member
Oct 25, 2017
770
I got the Paint Set yesterday, though I'll probably have to wait till the weekend to try anything out.
I wanted to give a wet palette a try; I'll probably start with an homemade version (like this article explains, for example), though I have to say this set looks very nice (albeit being on the expensive side).

Army painter just came out with a wet palette that is about half the price of the redgrass one. Peep it if you like the homemade. I use tupperware, paper towel and parchement paper for mine, but with the army painter one being so inexpensive, I'm considering the jump to the nice low profile version.
 

Boat Times

Made the Grade
Member
Oct 25, 2017
1,565
You do NOT need to buy that redgrass one. You can buy the army painter wet palette, or even a Sta-Wet palette for even cheaper and they are very good and will last a long time. If you are in the U.S. you can get the Sta-Wet for like $10-12 off amazon. Possibly even cheaper from a local Michaels or Hobby Lobby or something.
 

Griselbrand

Member
Oct 26, 2017
3,234
The Sta-Wet palette is so cheap but it does the job exceedingly well. It's what I use now and I couldn't recommend it enough. The only thing I would say is that it's not worth using the paper it comes with as it's much heavier paper than baking/parchment paper and will not saturate with water unless it's soaked before hand. Instead use wax free parchment paper directly on the moist sponge and smooth out the surface with something that offers a hard edge, like a credit card or something.
 

Dbltap

Member
Oct 31, 2017
784
Woodinville, WA
Well, I took the dive and bought 2 larger miniatures from Reaper. Both are Hill Giants. I also got two free extra mini's, some free paint and a ornament as some promotions they have going.

Is it true you don't need to primer the Reaper Bones miniatures?
 

Boat Times

Made the Grade
Member
Oct 25, 2017
1,565
Well, I took the dive and bought 2 larger miniatures from Reaper. Both are Hill Giants. I also got two free extra mini's, some free paint and a ornament as some promotions they have going.

Is it true you don't need to primer the Reaper Bones miniatures?

So, that is true to a degree. Reaper Bones don't react well to rattlecan primer, and they don't technically need primer. But they do need a coat of paint on top, and it can't be watered down paint. Something like their own Brown/Black liner or something along those lines would work. I primer all my reaper bones with airbrush primer and that works fine. Also if you aren't going to be using a primer you REALLY have to wash your Bones before painting.
 

sackboy97

Member
Oct 26, 2017
3,604
Italy
The Army Painter palette comes out close to the price of that other set with the shipping unfortunately. I will most likely stick to a homemade solution, I was just pointing out that the set looked cool :(

What about the miniature handle instead? They look kinda nice, though they seem more expensive than they should be.
 

Dbltap

Member
Oct 31, 2017
784
Woodinville, WA
So, that is true to a degree. Reaper Bones don't react well to rattlecan primer, and they don't technically need primer. But they do need a coat of paint on top, and it can't be watered down paint. Something like their own Brown/Black liner or something along those lines would work. I primer all my reaper bones with airbrush primer and that works fine. Also if you aren't going to be using a primer you REALLY have to wash your Bones before painting.
Thank you for the info.

I'm used to priming busts and figures with rattle cans. Does anyone use Army painter Primer? How do you like it?
 

Griselbrand

Member
Oct 26, 2017
3,234
The Army Painter palette comes out close to the price of that other set with the shipping unfortunately. I will most likely stick to a homemade solution, I was just pointing out that the set looked cool :(

What about the miniature handle instead? They look kinda nice, though they seem more expensive than they should be.

I have four of the GW ones, three regular sized and a large one for big bases. Prior to that I just used blue tac to hold models onto old paint pots. I'm curious about the ones with the curved element over the top for anchoring your hand or the brush but I haven't tried them myself.
 

Boat Times

Made the Grade
Member
Oct 25, 2017
1,565
sackboy97 I own 3 GW miniature handles, but honestly you could also just make do with blue tack and pill bottles, old paint pots, wine corks etc. For bigger figures I use the lid on my old rattle cans.
 

sackboy97

Member
Oct 26, 2017
3,604
Italy
Thanks for the replies. I'll see what I can find for the moment, and I'll probably grab an "official" one sooner or later. Probably sooner if they have it at my local comic book store.
 

Bombless

Member
Oct 25, 2017
3,573
The GW handles are good but very expensive for what they are tbh. I remember them even selling some red ones for more money, lol. I do have one that I use now and then but I could live without it.
 

Ohnonono

Member
Oct 29, 2017
780
Holy Terra
Pill bottles with stickie tack on top is what I use to hold models while I paint them. Yet to have an issue and its a few bucks for a ton of stickie tack.
 

Foofaraw

Member
Oct 25, 2017
770
Pill bottles with stickie tack on top is what I use to hold models while I paint them. Yet to have an issue and its a few bucks for a ton of stickie tack.
I'd just throw some sand or something in the pill bottle, helps keep it from being top heavy. I also think the weight feels a bit better in the hand.
 

Ohnonono

Member
Oct 29, 2017
780
Holy Terra
I'd just throw some sand or something in the pill bottle, helps keep it from being top heavy. I also think the weight feels a bit better in the hand.
Forgot about that! I use random stuff around my office, anything with a a little weight to it works. Also if your going to do conversions, stickie tack is really great. Its super reusable and easy enough to get off the plastic.
 

sackboy97

Member
Oct 26, 2017
3,604
Italy
I'll paint my minis today, so I wanted to make sure about the order and some other details;
  1. Assemble the kits.
  2. This is where I would prime them, if I had primer.
  3. Make the wet palette and put some paint in it. I should shake the bottles some, I'd imagine, and thin them a bit further once on the palette.
  4. Loosely following the pictures on the box, I should start with the Abaddon Black, covering everything. In general, I'll try going for a couple of layers to start with; I'm not sure how long it should take for it to dry.
  5. Then Macragge Blue, not quite everywhere; should I try to leave some black out at the edges, to give it some shading? Or should I use some kind of wash for that?
  6. Then the Gold details and the face for the one mini without the helmet one.
  7. There's Agrax Earthshade in the kit, which as far as I can tell is a wash meant for the gold sections; should I also put it on the palette, or are these shades ready out of the bottle? Would thinning the Black a lot be enough to make some kind of wash for the armour?
  8. For the base there's a "texture" colour, does that mean I have to treat it differently than the others?
 

StaffyManasse

Member
Oct 28, 2017
1,208
sackboy97

I'll try to answer point-by-point, but before I go to them I'll say remember to have fun and keep in mind the next mini is always better. This is to say, don't be discouraged and aim for perfection. Rather aim for fun and improvement. And you will improve if you stick at it, I promise!

1. Yeah. Some prefer painting in pieces, but assembling the kit is solid approach. I fully assemble 90% of models and only paint in parts on in some specific cases. Remember to keep an eye on those mold lines and clean them off at this point. It really pays off!

2. Yeah, this would be the primer phase. That being said I know a guy who hand primes everything with Abaddon Black and he paints awesome minis. Like, the guy has won competitions. I apply black airbrush primer (Vallejo) with a brush during winter and it works alright.

3. Yeah, shake the paints really well and then put a little on the wet palette. Then add water on the palette to get the paint thin enough. The amount of water you need varies on the paint you are using, so just experiment. You'll quick learn to see when the paint is too thick (won't run, leaves brush marks, uneven surface) or too wet (runs everywhere).

4. Related to 2. A base coat of Abaddon Black is not a bad idea in your case. Just keep in nice and thin not to obscure any details.

5. Here you have options. You can use the black undercoat as a shade and leave some showing. That is one way of doing it and can lead to nice results with really striking contrast. Other option is painting everything with the blue, so that the whole model is same solid blue and then add wash. This is the method a lot of people use and can give some nice results. The step of adding a wash to solid colour mini and seeing it come to life with the variations of shadow on the mini is a fun one. You can also retouch the areas with too much wash on them with the blue paint after the wash has dried for a cleaner look.

6. Sounds good.

7. They are good straight from the pot. You can also make washes from any paint, but using a acryllic medium is better that water for that use. Also you will trip over your shade pot at some point during your hobby. Usually it's Nuln Oil. Don't worry. It's part of the deal. And oh, black lining places like armour panels for shading is absolutely a thing you could try if you want. It gives for a more striking shadow than a shade. Experiment and see what you like!

8. Yeah, the texture paints are probably the ones that have some "sand" in them. You can just put them on the base with some small tool. Don't use your brush because it will be destroyed. You can then apply the wash to shade the base too when it's dry.


Hope these help!
 

sackboy97

Member
Oct 26, 2017
3,604
Italy
sackboy97

I'll try to answer point-by-point, but before I go to them I'll say remember to have fun and keep in mind the next mini is always better. This is to say, don't be discouraged and aim for perfection. Rather aim for fun and improvement. And you will improve if you stick at it, I promise!

1. Yeah. Some prefer painting in pieces, but assembling the kit is solid approach. I fully assemble 90% of models and only paint in parts on in some specific cases. Remember to keep an eye on those mold lines and clean them off at this point. It really pays off!

2. Yeah, this would be the primer phase. That being said I know a guy who hand primes everything with Abaddon Black and he paints awesome minis. Like, the guy has won competitions. I apply black airbrush primer (Vallejo) with a brush during winter and it works alright.

3. Yeah, shake the paints really well and then put a little on the wet palette. Then add water on the palette to get the paint thin enough. The amount of water you need varies on the paint you are using, so just experiment. You'll quick learn to see when the paint is too thick (won't run, leaves brush marks, uneven surface) or too wet (runs everywhere).

4. Related to 2. A base coat of Abaddon Black is not a bad idea in your case. Just keep in nice and thin not to obscure any details.

5. Here you have options. You can use the black undercoat as a shade and leave some showing. That is one way of doing it and can lead to nice results with really striking contrast. Other option is painting everything with the blue, so that the whole model is same solid blue and then add wash. This is the method a lot of people use and can give some nice results. The step of adding a wash to solid colour mini and seeing it come to life with the variations of shadow on the mini is a fun one. You can also retouch the areas with too much wash on them with the blue paint after the wash has dried for a cleaner look.

6. Sounds good.

7. They are good straight from the pot. You can also make washes from any paint, but using a acryllic medium is better that water for that use. Also you will trip over your shade pot at some point during your hobby. Usually it's Nuln Oil. Don't worry. It's part of the deal. And oh, black lining places like armour panels for shading is absolutely a thing you could try if you want. It gives for a more striking shadow than a shade. Experiment and see what you like!

8. Yeah, the texture paints are probably the ones that have some "sand" in them. You can just put them on the base with some small tool. Don't use your brush because it will be destroyed. You can then apply the wash to shade the base too when it's dry.


Hope these help!
Thanks a lot for the thorough answer. Of course I'll just do my best, but I had these few doubts that I wanted to clear up before starting.
I'll definitely post the result once I'm finished.
 

StaffyManasse

Member
Oct 28, 2017
1,208
Thanks a lot for the thorough answer. Of course I'll just do my best, but I had these few doubts that I wanted to clear up before starting.
I'll definitely post the result once I'm finished.

You're welcome! I had a few minutes to spare. :)

And do post pics, always fun to see even if I don't comment that often, I look through every single picture posted here.
 

sackboy97

Member
Oct 26, 2017
3,604
Italy
It's taking longer than I thought it would, but I'm very pleased with how it's going. This is after 2 full coats and some retouching here and there:
Z45Mw8n.jpg