Two classes to unlock left for the whole menu here. Too bad the double xp weekend has come to a close. Gonna tone it down, maybe one game a day to give some other games a bit more time.
-
Ever wanted an RSS feed of all your favorite gaming news sites? Go check out our new Gaming Headlines feed! Read more about it here.
-
We have made minor adjustments to how the search bar works on ResetEra. You can read about the changes here.
You are using an out of date browser. It may not display this or other websites correctly.
You should upgrade or use an alternative browser.
You should upgrade or use an alternative browser.
The Yellow Devil fight is too hard :/
Edit: Finally completed it, with 5 seconds to spare! Feels... great!
Edit: Finally completed it, with 5 seconds to spare! Feels... great!
Last edited:
Managed to get my five Yellow Devil matches, that boss is pretty fun.
So the beta suit I came out of this season the most surprised was Vigilant Beta. Feels excellent in accuracy and raw damage. The most underwhelming was Murasame Beta. It's not bad by any means but it's such a basic class and the wind counter is mainly for the small dino mobs overall.
Otherwise it's been solid.
I find Yellow Devil is only really that tough on the first couple of tries. Spent the weekend fighting him so fought him a ton. Once people learn the tricks to his wall etc. he's actually fairly straight forward to melt. Ive had some really satisfying wins (including being MVP!) against the dude!
It's really a shame that all the cool (and paid) skins are for the original variants, but I want to level the other variants.
We should really start planning for an Era game soon, probably Time Loop Rebellion. All my suits are level 10 and I got my Megaman skin.
The key to the Yellow Devil fight is Vigilant any version. The other suits are mostly either only good for damage or survivability. Vigilant gets you both. Just don't be the dick that picks Zephyr Beta just so you'll do no damage while getting the EXP and the completion. Vigilant's vault is going to save you from ringouts and beams more times than not, you'll help get rid of snipers in phase 2, and you'll be doing insane damage the entire time.
The key to the Yellow Devil fight is Vigilant any version. The other suits are mostly either only good for damage or survivability. Vigilant gets you both. Just don't be the dick that picks Zephyr Beta just so you'll do no damage while getting the EXP and the completion. Vigilant's vault is going to save you from ringouts and beams more times than not, you'll help get rid of snipers in phase 2, and you'll be doing insane damage the entire time.
I'm down, def for time loopWe should really start planning for an Era game soon, probably Time Loop Rebellion. All my suits are level 10 and I got my Megaman skin.
The key to the Yellow Devil fight is Vigilant any version. The other suits are mostly either only good for damage or survivability. Vigilant gets you both. Just don't be the dick that picks Zephyr Beta just so you'll do no damage while getting the EXP and the completion. Vigilant's vault is going to save you from ringouts and beams more times than not, you'll help get rid of snipers in phase 2, and you'll be doing insane damage the entire time.
Time Loop is hopefully coming really soon... I did the original final boss today and it just feels weirdly low stakes after some of the optional bosses added later lol.
Managed to pull myself up to 70K Dinos over the weekend. Reckon another good week's worth of play will get me the remaining 30K I need to finally plat the game. Then Ill tune in for Time Loop whenever that is, and Im probably then "done" with the game until/if it gets more content.
Managed to pull myself up to 70K Dinos over the weekend. Reckon another good week's worth of play will get me the remaining 30K I need to finally plat the game. Then Ill tune in for Time Loop whenever that is, and Im probably then "done" with the game until/if it gets more content.
This coming weekend!Time Loop is hopefully coming really soon... I did the original final boss today and it just feels weirdly low stakes after some of the optional bosses added later lol.
Managed to pull myself up to 70K Dinos over the weekend. Reckon another good week's worth of play will get me the remaining 30K I need to finally plat the game. Then Ill tune in for Time Loop whenever that is, and Im probably then "done" with the game until/if it gets more content.
Absolute perfect timing! Cant wait, will definitely hammer that mode as well this weekend as I grind the last of my trophies.
Just had a Neo T-Rex fight, haven't seen one of those outside the Gauntlet in a long time. Crazy how easy it feels now after the Yellow Devil & Neo-Tri. Months ago the fights with it ended at 5-10 respawns left and now we finished at 28-ish out of 30... I think? Absolute cakewalk.
For sure, I was really happy with the runs Ive had with the Neo T Rex over the weekend. That said... I remember one match had people dropping like flies agains the T Rex for some reason, and I was really confused as it just feels so simple these days!Just had a Neo T-Rex fight, haven't seen one of those outside the Gauntlet in a long time. Crazy how easy it feels now after the Yellow Devil & Neo-Tri. Months ago the fights with it ended at 5-10 respawns left and now we finished at 28-ish out of 30... I think? Absolute cakewalk.
bruh, it's past the weekend and the 2x exp is still going on. Oh boy. Down to one left after one more match.
I want it to never end!
Beat Yellow Devil on third try. People seem to be starting to figure it out. I still need to see him two more times to get these collab rewards!
Besides the "kill 100,000 dinos" achievement, I have one left. That's the "kill 20 dinos as a pilot". Apologies to my teammates for the next few matches.
Also… my stats say I've only killed 20,572 dinos. Yikes. It's gonna be a while before I get that last one.
Also… my stats say I've only killed 20,572 dinos. Yikes. It's gonna be a while before I get that last one.
Time Loop Rebellion #1!
New
3 key points for Time Loop Rebellion:
- When there is only 1 hammer left that needs to be used, everybody else run to Behemoth to do damage
- Shoot the satellites/projectors, they open up safe spots from the map-wide instant kill
- Make sure there are at least 2 Barrages because there will be a lot of Ankylos
- When there is only 1 hammer left that needs to be used, everybody else run to Behemoth to do damage
- Shoot the satellites/projectors, they open up safe spots from the map-wide instant kill
- Make sure there are at least 2 Barrages because there will be a lot of Ankylos
Sweet. Looking forward to jumping in and trying the mode. Will make a change from running normal matches for a change! Im now 75K dinos to the last trophy, will have it this weekend if all goes to plan.
I don't feel like anyone knows what to do when the ABCD thing comes up. That part is taking way longer than it should and then there's only 1 or 2 revives left and that's the end 🙁
They all have to be capped at the same time for the bar to progress. So everybody's going to have to be moving around a lot.I don't feel like anyone knows what to do when the ABCD thing comes up. That part is taking way longer than it should and then there's only 1 or 2 revives left and that's the end 🙁
For sure. Half the time 6 players are on one side both dying & failing to hold that half… and the other 4 are managing to hold the other 2 points just barely due to the lack of help. It's pretty funny at times, but that's how it be.I don't feel like anyone knows what to do when the ABCD thing comes up. That part is taking way longer than it should and then there's only 1 or 2 revives left and that's the end 🙁
They are unfortunately time limited.Are the "battle passes" limited time only or you can get them and play them as you wish?
The problem Im having with the ABCD phase is that people are fucking stupid. You'll have three of them occupied (unevenly of course), then one is left unoccupied. Everytime I dash to it, then you get several people do the same thing leaving something else unoccupied and the whole thing begins again.
Its a fun mode otherwise, once its run a few times and people grow brains Im sure it'll be fine. Its like Yellow Devil day 1, by day 2 Im sure we'll have things going along way more efficiently.
Meanwhile, Im now at 80K Dinos... Definitely getting this done this weekend (maybe tomorrow) if Im diligent.
Big fan of how the 3 'challenges' are effectively means to encourage players to play roles.
It's hard enough as-is with them, can't imagine without. Exoprimal's really nicely designed in the role front so that it's very rare that a team ends up stuck without roles. Support is some of the most fun in the game, so are Defenders, and so are Assault characters.
It's hard enough as-is with them, can't imagine without. Exoprimal's really nicely designed in the role front so that it's very rare that a team ends up stuck without roles. Support is some of the most fun in the game, so are Defenders, and so are Assault characters.
The Behemoth's charging stage a few minutes into a TLR fucks us over so much, 3/4 games I've played so far have ended up with almost the entire team getting wiped out at that point because we couldn't damage the boss enough in the time given.
6K Dinos left and its now fucking impossible to play a normal match without a boss. This really sucks, at this point Ill have to wait several weeks until the YD event ends just so I can play the game "normally". I dont mind the odd boss, but every time? Its ruining what Im trying to do here lol.
And just as Id planned, complaining fixed things. Now things are behaving normally. 5K left lol.
And just as Id planned, complaining fixed things. Now things are behaving normally. 5K left lol.
Last edited:
I am typing out a guide for Time Loop Rebellion!
Yep.... I'll get to why that happens in the guide, hahaha.
The Behemoth's charging stage a few minutes into a TLR fucks us over so much, 3/4 games I've played so far have ended up with almost the entire team getting wiped out at that point because we couldn't damage the boss enough in the time given.
Yep.... I'll get to why that happens in the guide, hahaha.
Time Loop Rebellion #1 - this event may change with each iteration; it is unknown if that will be the case.
Notable facts:
TIPS amalgamated but kinda repeated in slightly more detail:
Notable facts:
- There are multiple variants of Time Loop Rebellion with different dinos, swarms, and even attack patterns from Behemoth. All of this means - there are multiple difficulties for the mode. Some are def just harder vs easier than others.
- Team composition is almost the single-most-important factor. I don't mean 3 healers/4 defenders/3 attackers, I mean attack range variety. Almost EVERY mode will include nigh constant Sniper Neosaurs, for example, and if your team is almost all melee then it literally won't matter, you WILL lose.
- Furthermore, the glowing radiation/shield droids are virtually impossible to defeat without ranged weaponry and uh... Yeah. If you can't, the game's already over until peeps mix it up
- Also, of course, if you can't stop Behemoth's instant kill because you lack the range to hit them while carrying the pile bunker... yeah... that's also just an instant loss.
- 20 lives is not a lot. You WILL often get down to the single-digits here, in both lives and time.
- Part 1:
- First, you're tasked with Area Defense. At ~50-55%, a shield-barrier will push all players out & drones need to be taken out to resume taking the Area.
- Note: Sniper Neos spawn alongside the 'ridges' of the lower elevated area & sometimes on boxes directly next to the Area Defense point. These NEED to be cleared or you will die, and they respawn constantly.
- Note: The most effective tactic at dealing with large dinos, like all Area Control, is to control aggro and just... stay away from the point. If a tank simply taunts 'em then there's a solid chance the point may only go down once or twice, instead of 5-6 times.
- First, you're tasked with Area Defense. At ~50-55%, a shield-barrier will push all players out & drones need to be taken out to resume taking the Area.
- Part 2:
- With the Area Defense cleared, Leviathan will split the map down the middle in a miniature Omega Hammer + Payload mode. Around 30-40%, Behemoth will do 2 Air Strikes on both sides. Around 50%, the cubes will cross over to the others side.
- Note: Air Strike patterns vary in general. Do not expect the same patterns until you know what a variant is like, because it will vary.
- Once split up, depending on which 'side' you are on (Left vs Right) your actions will be different.
- If on the LEFT side, beeline the 'lower left corner' which is closest to you, to get the Cube asap. This is ALSO where future point C will be.
- If on the RIGHT side, beeline the 'upper right corner' which is furthest from you, to get the Cube asap. This is ALSO where future point B will be. **RIGHT SIDE IS MORE DIFFICULT.**
- Overall timeline summary:
- There are roughly 6 'phases' to Part 2.
- Phase 1: ~0-25% - Cube on the move, Basic Dinos spawn.
- Phase 2: ~25-40% - Cube on the move, Large Dinos spawn & two Air strikes occur.
- Phase 3: ~50% - Cube swaps sides & is on the move, Large Dinos spawn
- Usually an Anky & Carno/T-rex
- Phase 4: ~90% - Cube is stationary, Large Dinos continue to spawn and Behemoth unleashes a Mega Laser.
- Phase 5: 100% - Omega Hammer needs to be moved to center, then assist other side.
- Phase 6: Escort the Pile Bunker to Behemoth while stopping it's mapwide wipe.
- Phase 1 tips:
- Nothing to say, just move dat cube!
- Phase 2 tips:
- So, Air Strikes are the big threat here.
- If you're on the RIGHT side, these Air Strikes will occur roughly on the ramp section of the map, with the cube 'straddling' BOTH air strikes; there is nothing you can do to keep the cube alive so focus purely on staying alive here.
- If you're on the LEFT side, only one Air Strike will hit the cube unless you're doing really poorly which is totally possible.
- Other than that, controlling the aggro of the large dinos is all you 'need' to do really. Chip them down, Mortar Rigs are very useful here because Ankys will be a constant threat & without Barrage - you will suffer.
- So, Air Strikes are the big threat here.
- Phase 3 tips:
- Controlling aggro continues to be the theme. You'll have to kill these buckos eventually, but the faster the cube moves... the better!
- Phase 4 tips:
- Alright, the tip here is EXTREMELY simple - have a Roadblock block the Mega Laser. That's it. Just dino punch until, y'know, the Laser comes then just block the laser.
- Phase 5 tips:
- Nothing special, just keep the hammer user moving! The faster they get there, the quicker you can assist your allies.
- Phase 6 tips:
- Vigilant is amazing in this mode in general, but is especially amazing right here. You can simply dump all your damage into Behemoth and as long as you've got 4-5 competent ranged users (or melee users who rushed in) you'll be able to handle the boardwipe. Deadeye is also amazing, of course.
- Escorting the Pile Bunker is as normal in Behemoth, just make sure to clock where they're at if you've cleared the damage check for the boardwipe, or aren't capable of dishing damage out anyway. Keep them alive!
- pew pew shoot da behemoth, anything below 65% of life is great!
- There are roughly 6 'phases' to Part 2.
- With the Area Defense cleared, Leviathan will split the map down the middle in a miniature Omega Hammer + Payload mode. Around 30-40%, Behemoth will do 2 Air Strikes on both sides. Around 50%, the cubes will cross over to the others side.
- Part 3:
- This is the REAL challenge. With Part 2 complete, you'll now be tasked with Uplink Control - on 4 points. Unlike normal Uplink Control, progress here is ONLY made if all 4 points are held simultaneously. There will be constant dinos, constant lasers & airstrikes. This is rough, but I'll getcha through it!
- ***OF EXTREME IMPORTANCE***: Once an UPLINK IS CAPTURED YOU DO NOT NEED TO BE NEAR IT. You want to keep it alive, yes, but it's not area control or payload - you can simply leave to help your other uplink point! If it's not in danger of being destroyed immediately, and your other point isn't online, then your point being online is effectively moot.
- Player Structure:
- Each point is at each corner of the map, and so you need to divide 10 players over 4 points. Hm. Not clean math, right? You'll want 2 players per point, for 8 dedicated players (for the most part) alongside 2 flexers.
- For some crazy confusing reason, you'll often see two sides split extremely poorly.One side may have 6 or even 7 players, while the other has 3 or 4. Almost always in this case, the side that struggles is...... the one with 6 or 7 players! How? Dunno! Doesn't matter!
- Essentially, if people can't just... pick a point and hang out, and not process too many players are on said point(s)... they're probably not very good. And that means they'll struggle even with the player advantage.
- Dedicated players mean 'you are in charge of a point' while flexers mean 'you in are charge of keeping points & playersalive'.
- For example, you may be a Nimbus and if you're only caring about point A and players on point A, point C will be struggling because they are unlikely to have a healer. If they do, they're lacking in damage or defense; and that's a problem. So, you should be a flexer, constantly making sure both sides needs are met in both damage & healing.
- Alternatively, you're on a side with 4 players but you're the only Roadblock! Oh no! In this case, YOU will want to be a flexer because when Behemoth does a Mega Laser you'll want to be able to react accordingly - they can target any 1 of the 4 points... and if you're on one that isn't targeted, but the other on your side is... and you don't have another Roadblock... down goes the Uplink.
- Unfortunately, actives roles are rarely static... so flexers are almost always the key to success. In practice, EVERYBODY should be flexers but that's just not how it works out.
- For some crazy confusing reason, you'll often see two sides split extremely poorly.One side may have 6 or even 7 players, while the other has 3 or 4. Almost always in this case, the side that struggles is...... the one with 6 or 7 players! How? Dunno! Doesn't matter!
- Each point is at each corner of the map, and so you need to divide 10 players over 4 points. Hm. Not clean math, right? You'll want 2 players per point, for 8 dedicated players (for the most part) alongside 2 flexers.
- Overall timeline summary:
- There are '6' phases to Part 3:
- Phase 0: 0% - Dinos will start spawning, Points B and C will be blocked by shield drones & need to be destroyed to begin. Ranged users, pay heed!
- Phase 1: ~0-25% - Dinos never stop spawning, and around 25% the first wave of airstrikes occurs.
- Phase 2: ~25-75% - Dinos never stop spawning, Behemoth can mega laser, and around 75% the second wave of airstrikes occurs.
- Phase 3: ~75-100% - Nothing changes, not really. A 3rd wave of airstrikes CAN occur if really struggling.
- Phase 4: 100% - Omega Hammer needs to be moved to center.
- Phase 5: Escort the Pile Bunker to Behemoth while stopping it's mapwide wipe.
- Phase 0:
- Just... shoot the shield drones after heading towards your point. Pay attention to your sides composition, and adjust as needed. If a swarm spawns, don't hang out in the middle unless you wanna see funny small dinos explode, which is fun. They'll die anyway!
- Phase 1:
- Simply hold your point, and an Anky usually spawns pretty soon. Aggroing them away from the point is a great idea, but they WILL break aggro to attack the point eventually no matter what you do. That's fine, just try and manage them as much as you can! A Carno may also spawn and they are the big threat to your points. Much faster, and harder hitting, they'll slow you down a lot.
- Sniper Neos or Exploder Neos are also more 'major' threats here. Both are constant spawns and both can shred players & points.
- AIRSTRIKE TIME:
- Depending on your variant, you WILL have different tactics here.
- If you're on the easier variants there will be one strike down the middle & one strike on both points. In those cases, like Part 2-Phase 2, just stay alive and care not at all for the points. You'll get 'em back in no time.
- If you're on the harder variants there will be 3 airstrikes - an appended 'map wide' airstrike at the end. The only tactic for this is to either jump 'off' the map without dying like via a platform or some sort of hover ability, or good timing.... or simply running back to spawn. Just run back to spawn in 99% of scenarios, you CANNOT salvage the uplinks anyway. YOUR SOLE GOAL HERE WILL BE TO NOT WASTE LIVES. You'll often be able to get 'back' to other players in time to revive them too!
- Also, note that all 4 points will get Radiation Drones that you'll need to destroy or your health will constantly degrade. This is always true.
- Depending on your variant, you WILL have different tactics here.
- Phase 2:
- It's like Phase 1!
- Except now you'll have to watch as Behemoth will fire off a Mega Laser or two periodically at various points! Unlike the airstrikes, which CANNOT be avoided, blocking Mega Lasers will substantially increase your success rate. Watch out for stupid stealth neos tho, I got got one of these times...
- Towards 75% or so, the second wave of Air Strikes'll come and this time featuring the 'mapwide' 3rd one regardless of variant. Again, follow the above instructions to effectively handle 'em.
- Phase 3:
- It's like Phase 2! Just don't be too 'slow' or a 3rd wave of airstrikes'll come, and by this time... the time itself is a gonna be problem.
- Phase 4:
- Like Part 2-Phase 5, nothing fancy. Just escort dem hammers!
- Phase 5:
- GO FOR IT! YOU CAN DO IT! BELIEVE IN YOURSELLLLLLLLLLLLLLLLLLLLLLF!
- There are '6' phases to Part 3:
- This is the REAL challenge. With Part 2 complete, you'll now be tasked with Uplink Control - on 4 points. Unlike normal Uplink Control, progress here is ONLY made if all 4 points are held simultaneously. There will be constant dinos, constant lasers & airstrikes. This is rough, but I'll getcha through it!
TIPS amalgamated but kinda repeated in slightly more detail:
- General tip is to 'straddle' between two points. ESPECIALLY if you're supporting.
- Once a point is captured in phase 2, you do not have to worry about standing on the point all the time.
- This is different for say, Roadblock or Kreiger who may need to block Lasers or larger dinos... but if you're any of the healers especially do not stay on point unless NEEDED.
- Even then, as a defender you may need to be closer to the middle to cover a point with your shield, and saving a point from lasers is a MASSIVE increase in success rate.
- It's far superior to straddle in-between so you can provide healing to either of the 2 points on your side, basically, but you also need to handle small dino aggro here which can be rough.
- If you've got people taking snipers out, Skywave Beta is amazing here. You can reach both points from the middle in the air and just constantly monitor your teammates.
- If not, Nimbus is amazing (arguably the best) but can't self-heal which is a struggle. You've got range at least, so you can play it closer to a point & your allies.
- Witch Doctor has the least range but also the highest mobility, making straddling hard... but you can self heal & stun to more easily hang out in the middle.
- Flex them flexers!
- Once a point is captured in phase 2, you do not have to worry about standing on the point all the time.
Savage Gauntlet is just too much. Going back to Wargames. I've got dinos to kill.
Also, it's 2x XP!
Also, it's 2x XP!
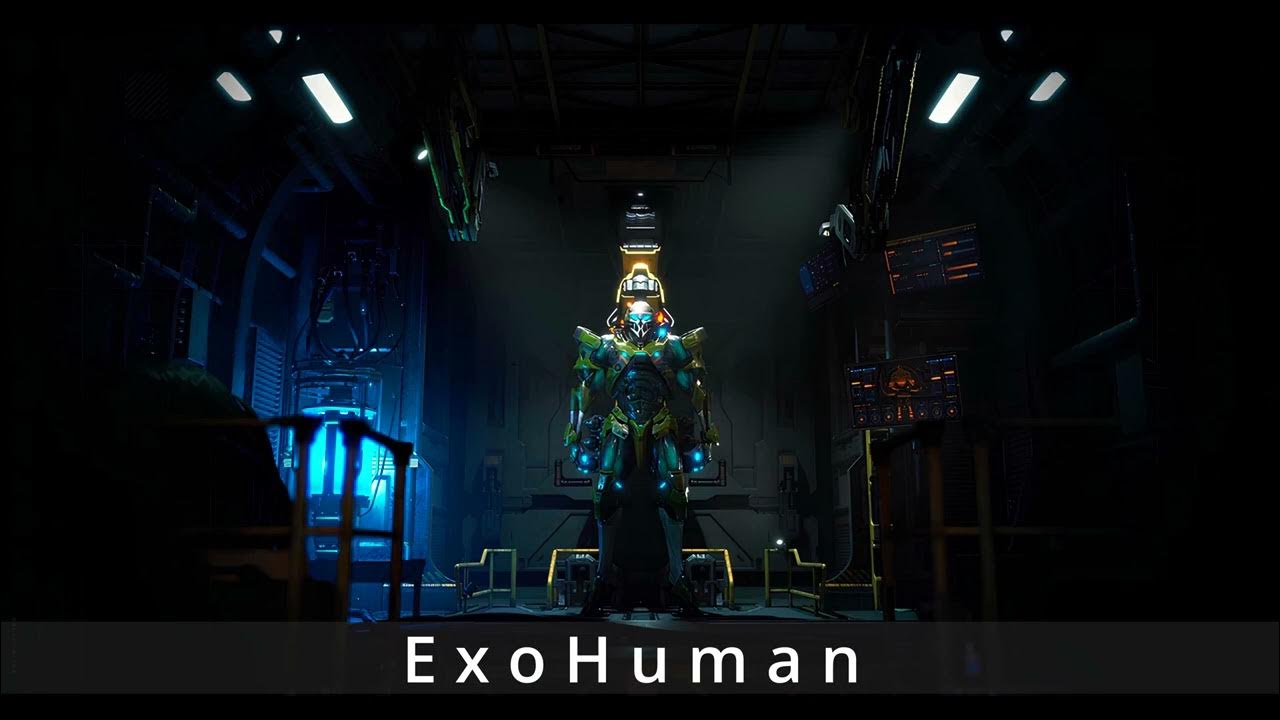
Casey Edwards uploaded official audio for ExoHuman
 www.youtube.com
Casey Edwards & Robin Adams - ExoHuman [Official Audio]
This song was featured in the game Exoprimal by CAPCOM. Check it out here: https://www.exoprimal.com/en-us/Spotify: https://open.spotify.com/track/1EAeXbzqE1...
www.youtube.com